Manage · Hardware settings
Manage your printer in the Dashboard
You can adjust your printer settings, enable/disable a printer, and send test prints/clear the queue from the Hardware page in the Business Dashboard. Find our full article on it here.
Find the Hardware page
This is the home base for everything below.
Select your store in the Business Dashboard.
Go to Settings and choose Hardware.
You'll see two sections: Order Tickets (your custom settings) and Printers (enable, test, clear queue).
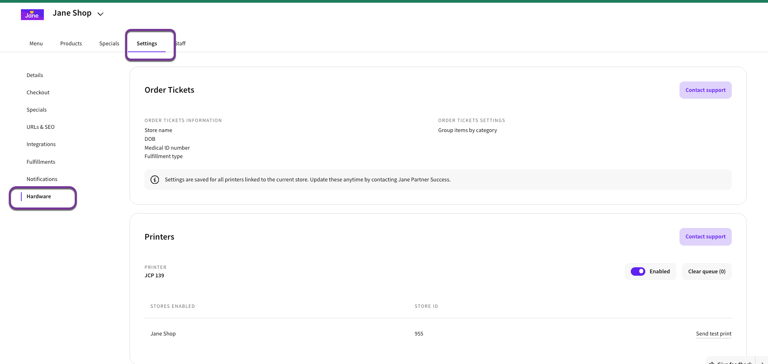
Don't see Hardware as an option? Check your access level with your account owner, or reach out using the buttons below.
Update your order ticket settings
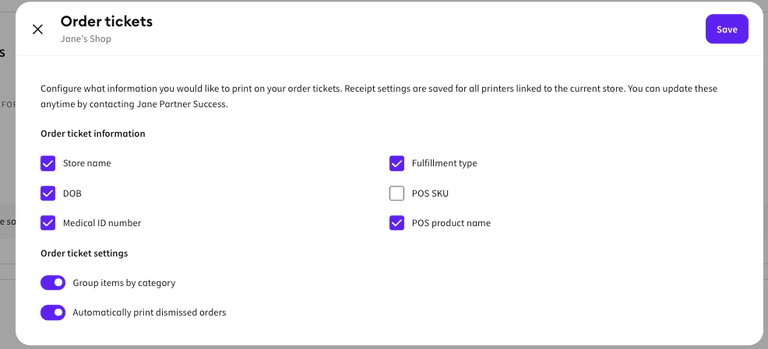
Click the pencil icon in the Order Tickets section to open the customization options.
Order Ticket Information — what prints on each ticket:
- Store name
- Customer date of birth (if required at checkout)
- Patient medical ID number (if required at checkout)
- Fulfillment type (pickup, delivery, kiosk, or curbside)
- POS SKU (SKU or batch # in your POS — not available for all POS)
- POS product name (the product name in your POS — not available for all POS)
Order Ticket Settings:
- Group items by category to help your fulfillment team process orders
- Automatically print a ticket when your team declines to process an order
Enable your printer
Once your printer has arrived and is set up, turn it on for your store.
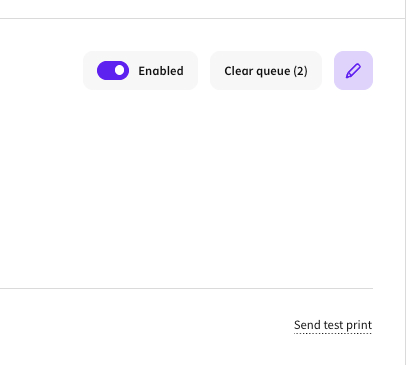
In the Printers section, find your printer.
Use the toggle to enable it for your store.
Send a test print
Confirm everything is set up correctly before your first order.
In the Printers section, select Send test print.
A test ticket should print within a few seconds.
Test print didn't come through? Choose Contact Support to run the self-troubleshooting tutorial, or start printer troubleshooting here.
Clear the print queue
If your printer becomes disconnected or backs up with order tickets you no longer need, clear the queue to reset it.
In the Printers section, select Clear Queue.
Queued tickets are cleared so new orders print cleanly.
Still stuck after enabling, testing, or clearing the queue? Send us the details below and our hardware team will help get you up and running.