Jane Printer Setup
Quick guide to get your Jane Cloud Printer up and running. Work through the setup steps below, then choose how your printer connects to continue.
Step 1 · Unbox the printer
Check the box for everything you'll need
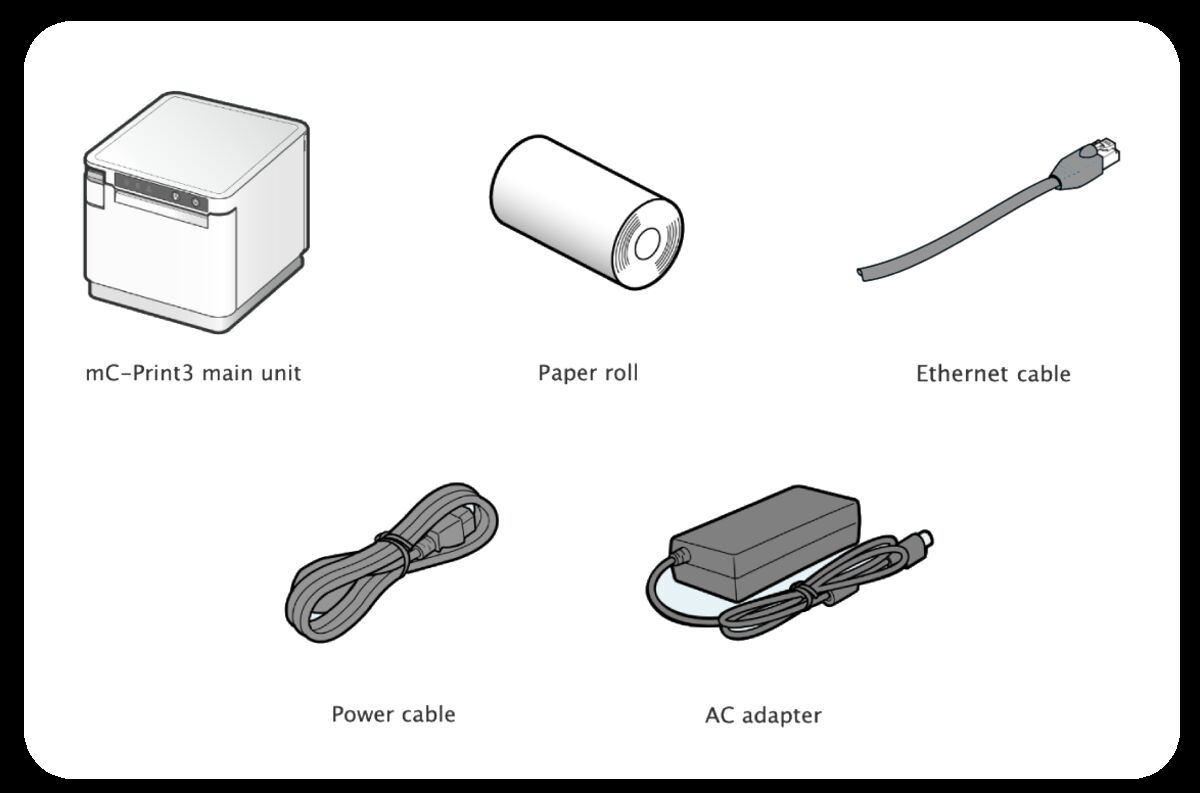
In the box you should have:
- mC-Print3 printer (main unit)
- Receipt paper roll
- Ethernet cable
- Power cable
- AC adapter
Step 2 · Prep the printer
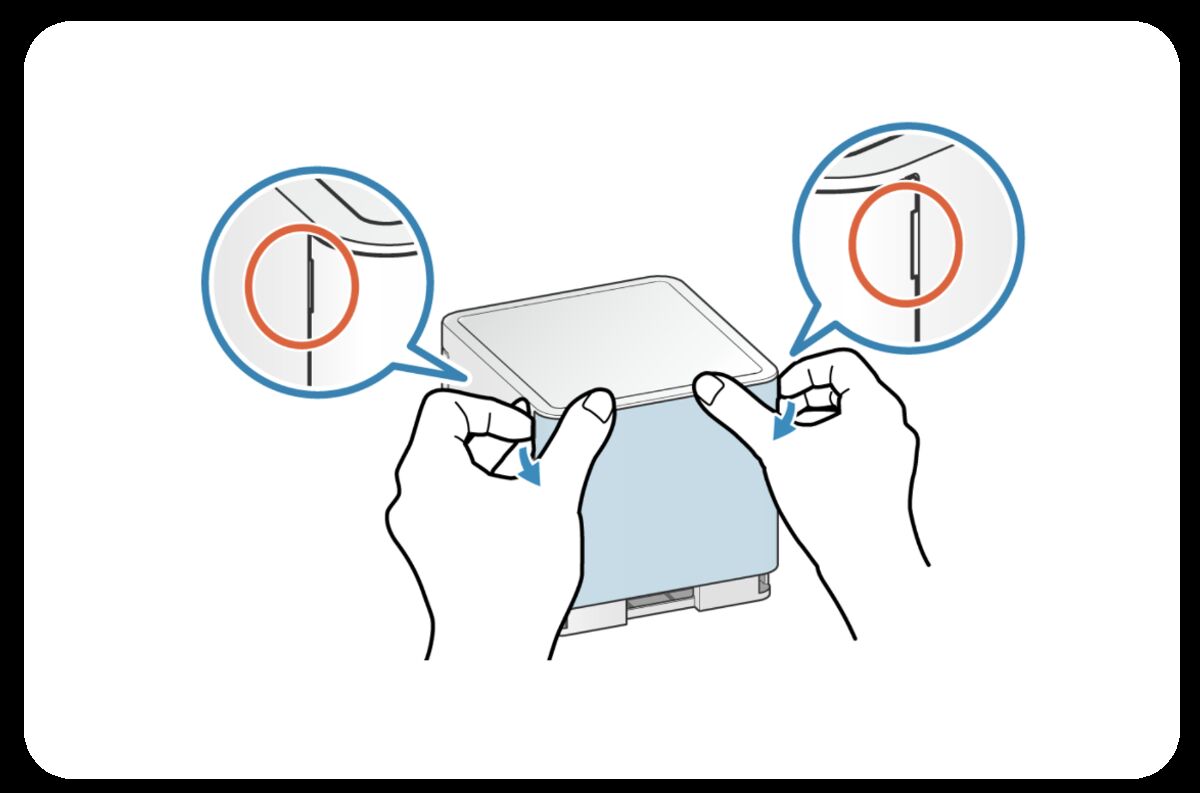
Set the printer on a flat surface and remove the back cover
Squeeze the clips on each side of the back panel and pull straight off.
Step 3 · Connect power
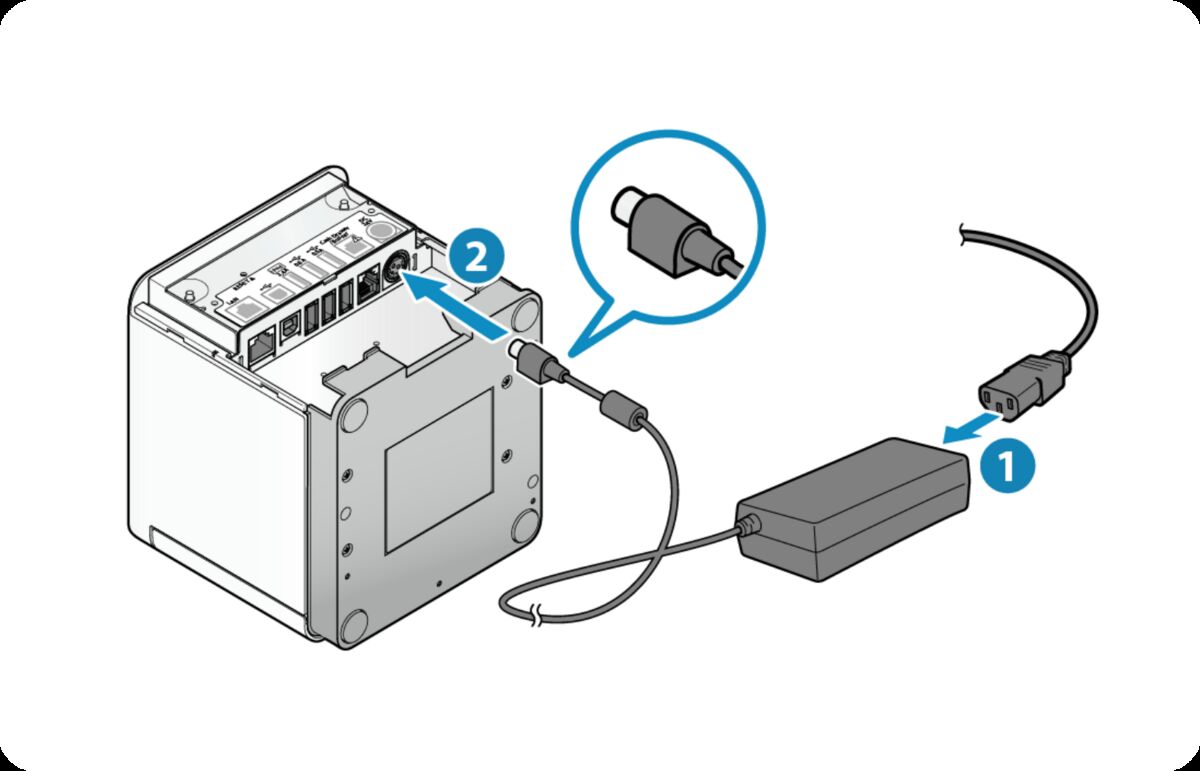
Plug the power cable into the AC adapter, then into the printer
Securely plug the power cable into the AC adapter first. Then plug the AC adapter into the printer with the flat side at the end of the cable facing the printer.
Step 4 · Plug into outlet
Plug the power cable into a wall outlet
Use a standard wall outlet near where the printer will live.
Step 5 · Power on
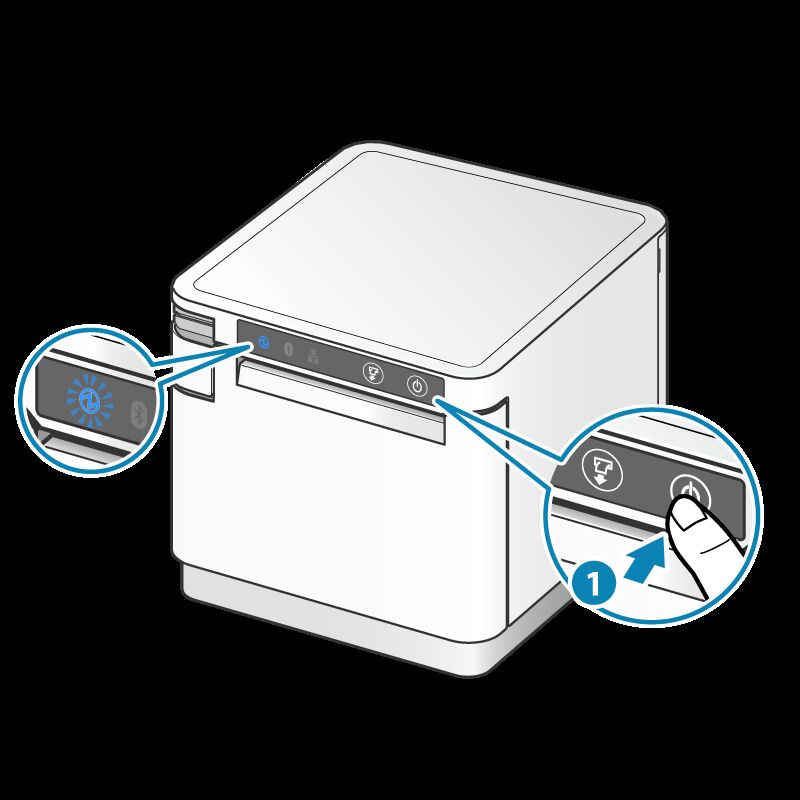
Press the Power button
The Power button is on the right side of the operation panel on the front of the printer. Hold it briefly — when the Power LED lights up, release the button.
Step 6 · Network
How is the printer getting on your network?
If Jane sent you a mini router, use the mini router path. Otherwise, plug the printer directly into your store's network.
Path A · Direct ethernet
Plug the ethernet cable into the printer and your network
One end goes into the printer's LAN port (labeled LAN on the back). The other end goes into your router, switch, or a wall port.
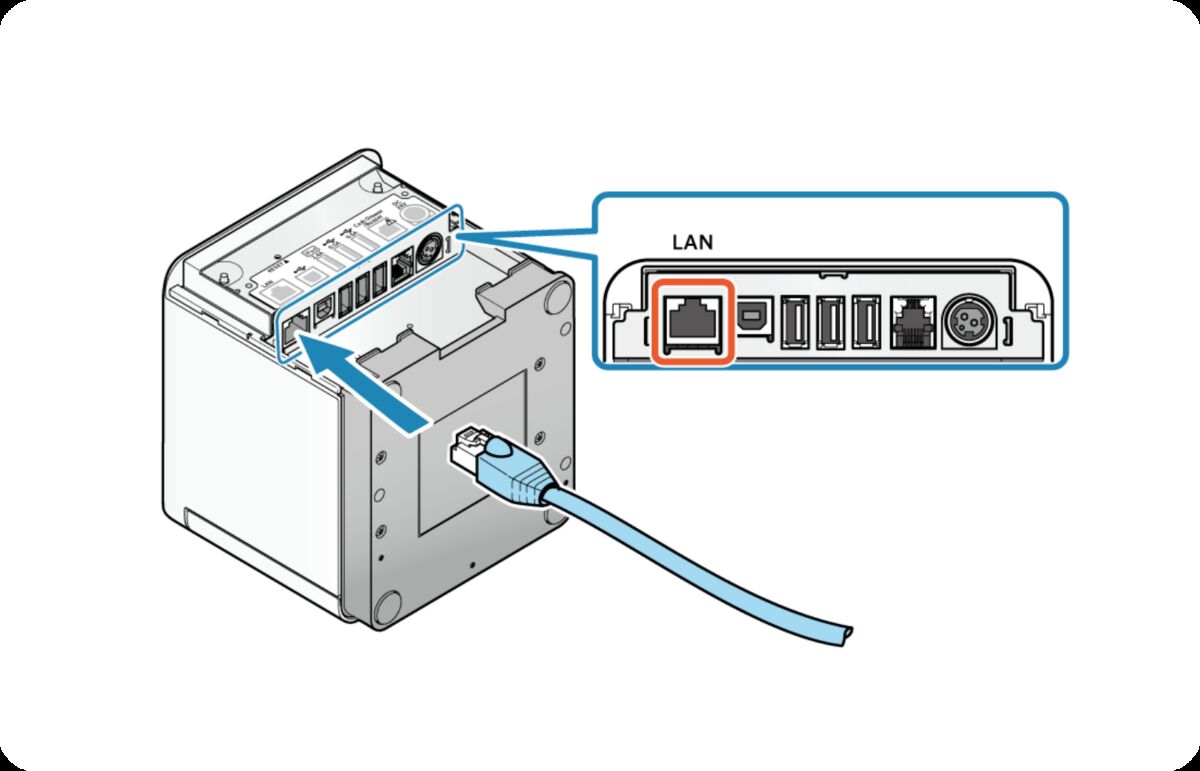
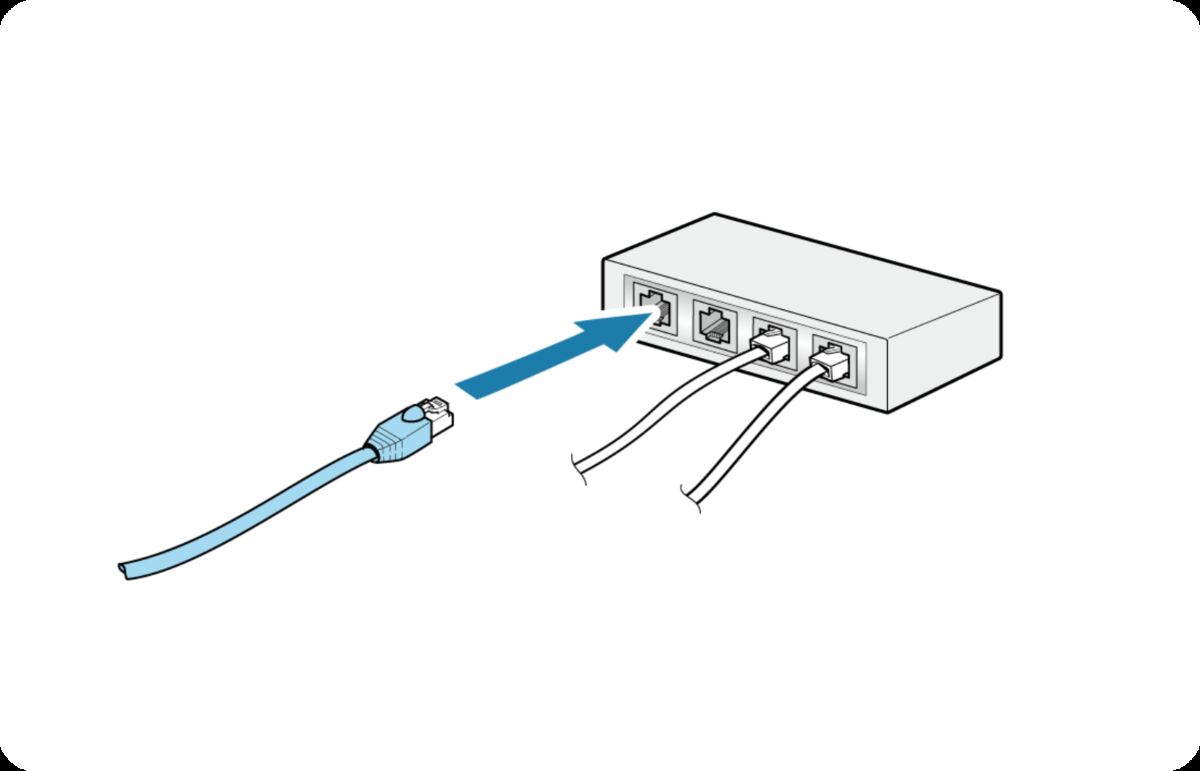
Once the printer is connected to the internet, the Network LED light should turn solid green.

Step 7 · Open the paper compartment
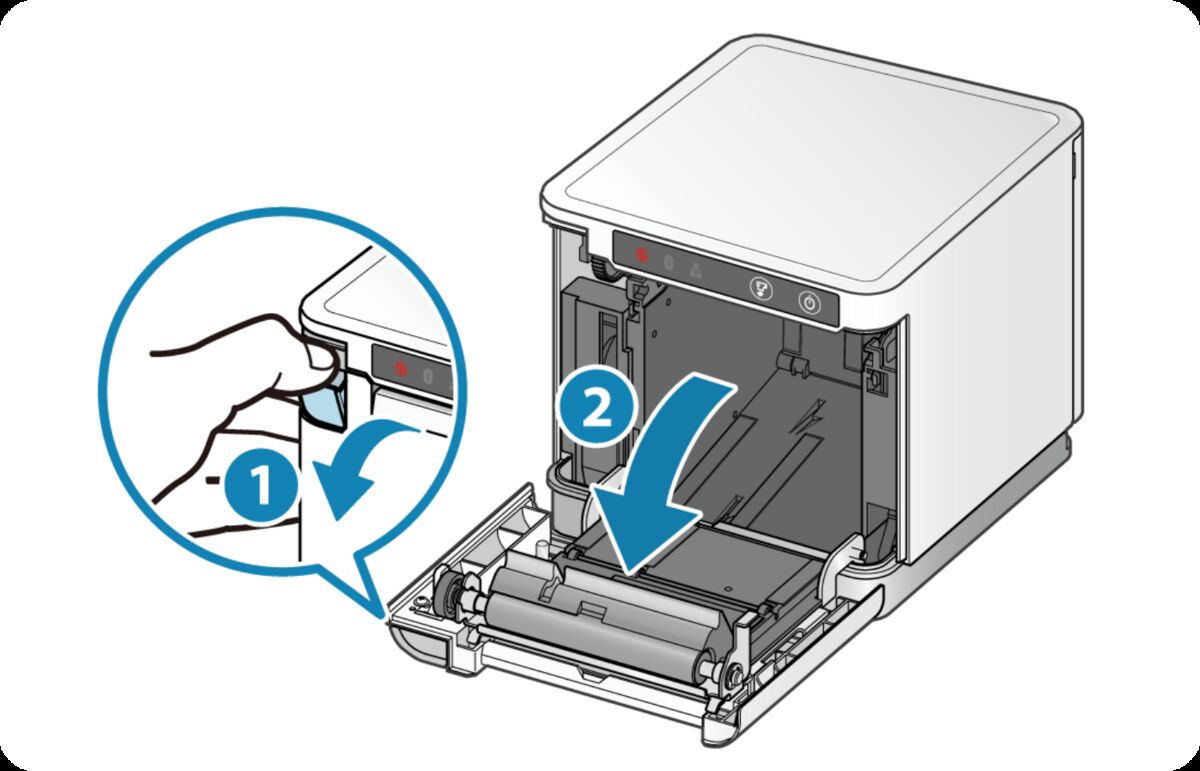
Open the front cover
Pull the release lever on the top-left of the front of the printer to swing the cover open.
Step 8 · Set the paper roll
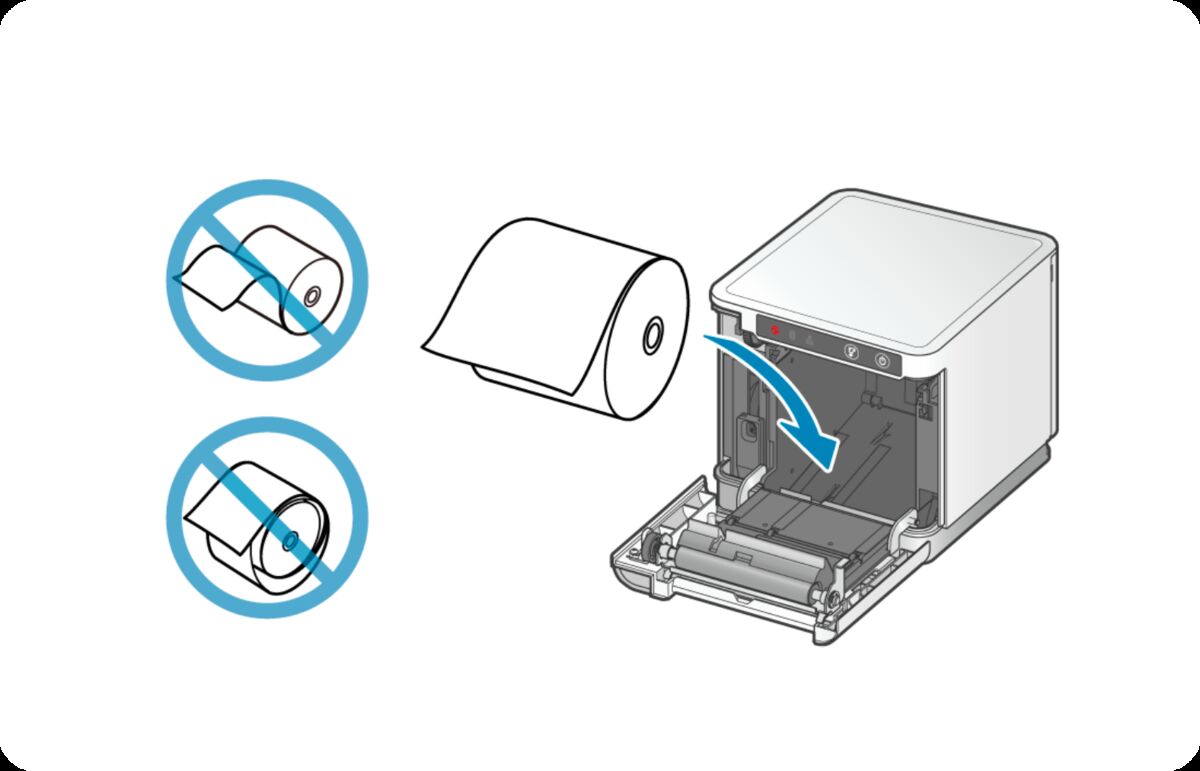
Place the receipt paper roll inside
Make sure the roll is tightly wound and not loose. Drop it in following the direction shown on the inside of the front tray — the paper should feed off the top of the roll, not the bottom.
Step 9 · Close the cover
Pull the paper out and close the cover
Hold the end of the paper so it sticks straight up out of the printer, then press the front cover firmly closed. The printer will automatically cut the paper once. When it's seated correctly the Power LED turns solid blue.
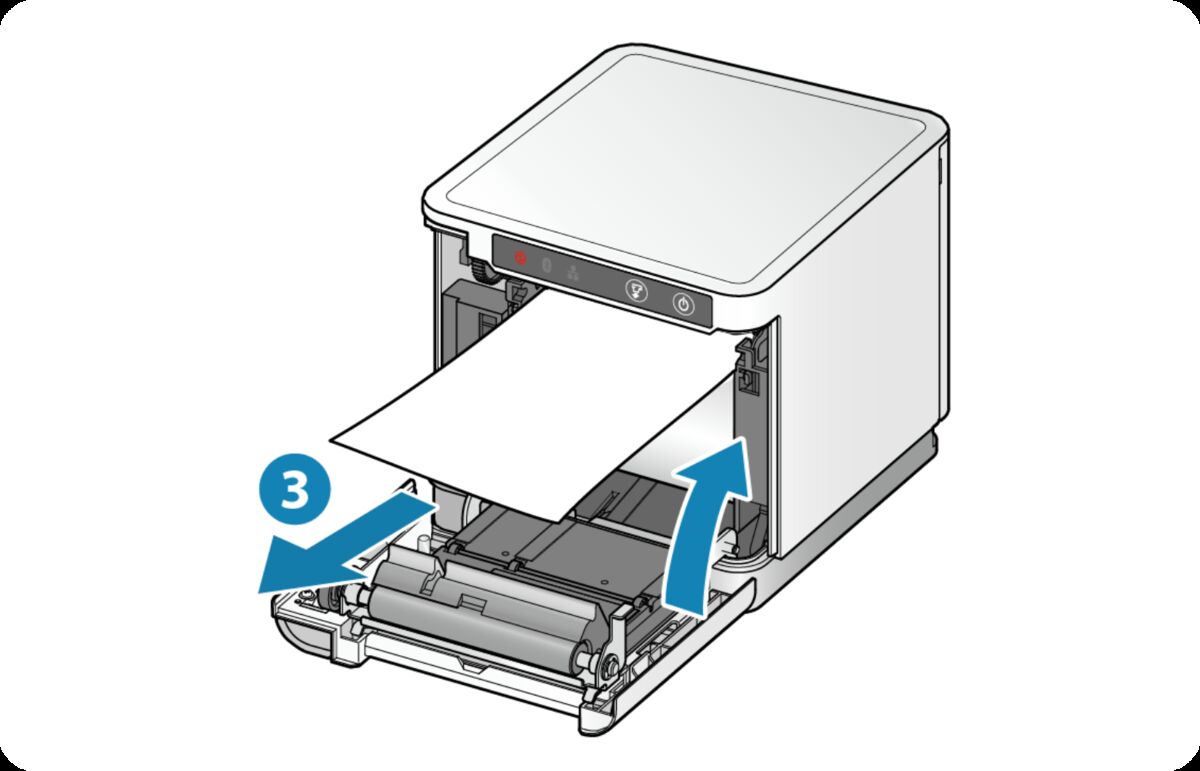
It may take a moment for the printer to turn solid blue.
Router 1 · Unbox
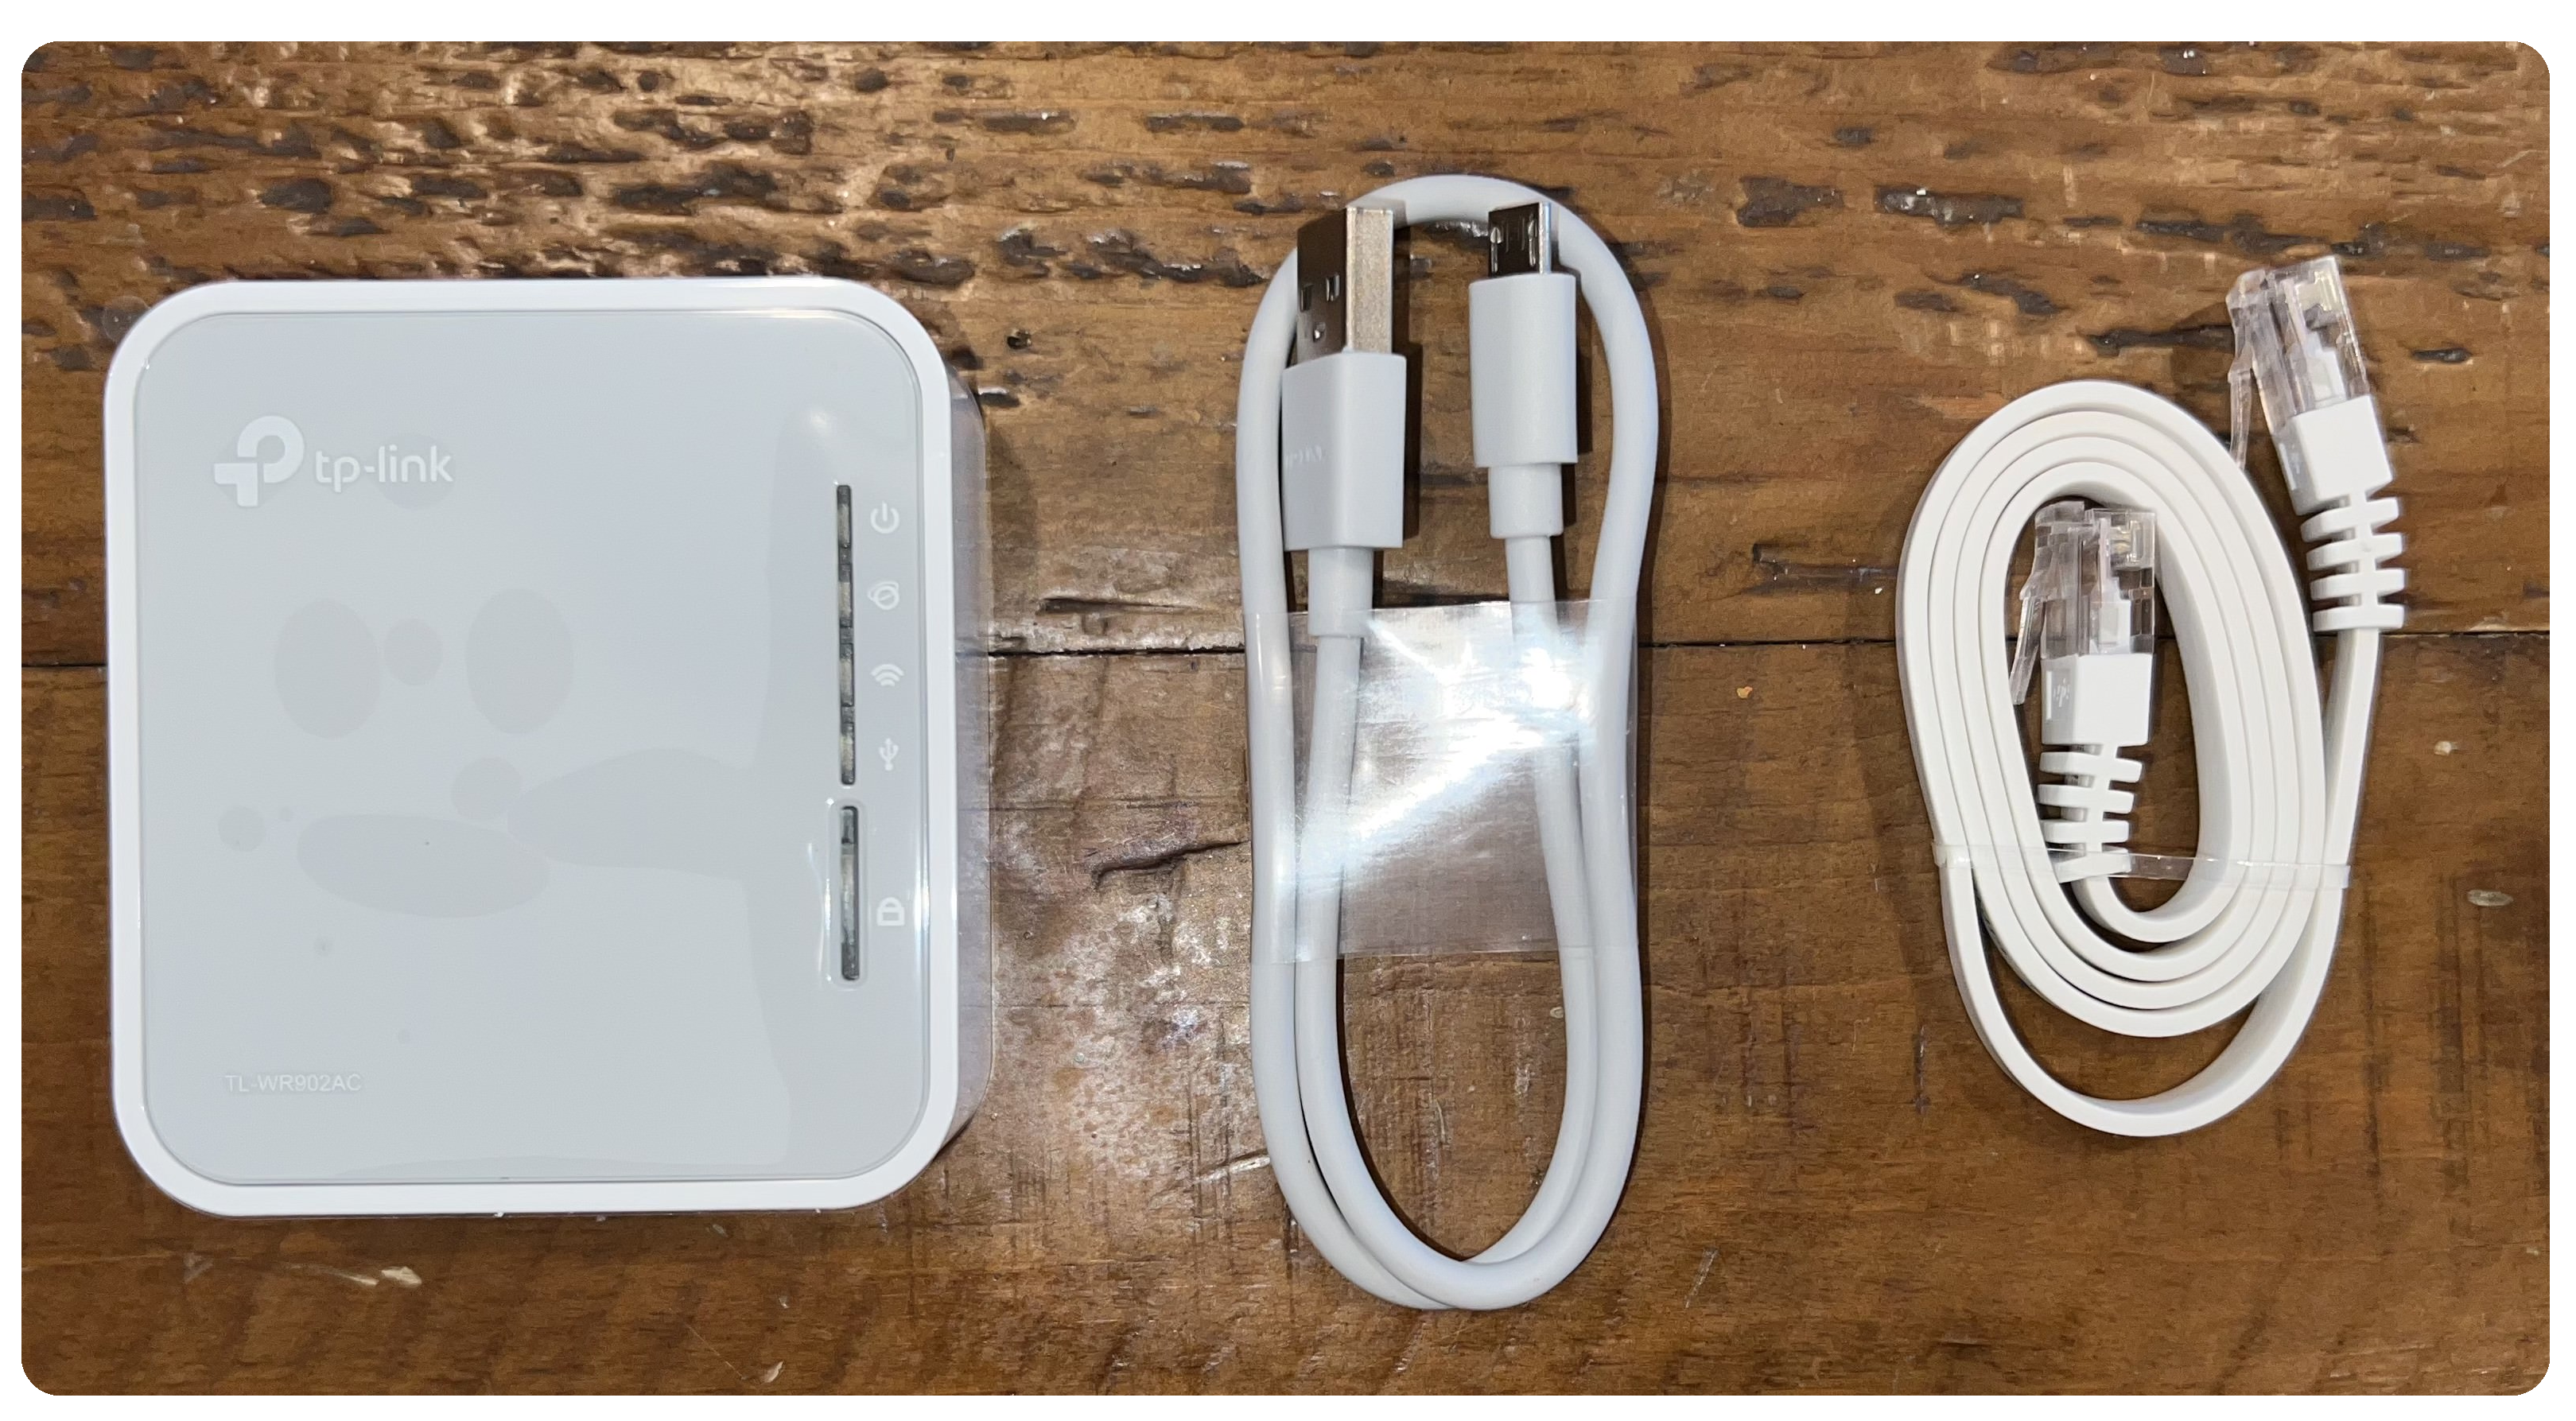
Check the mini router box
You should have:
- Mini router (small white travel router)
- Micro USB cable
- Ethernet/LAN cable
Router 2 · WiFi credentials
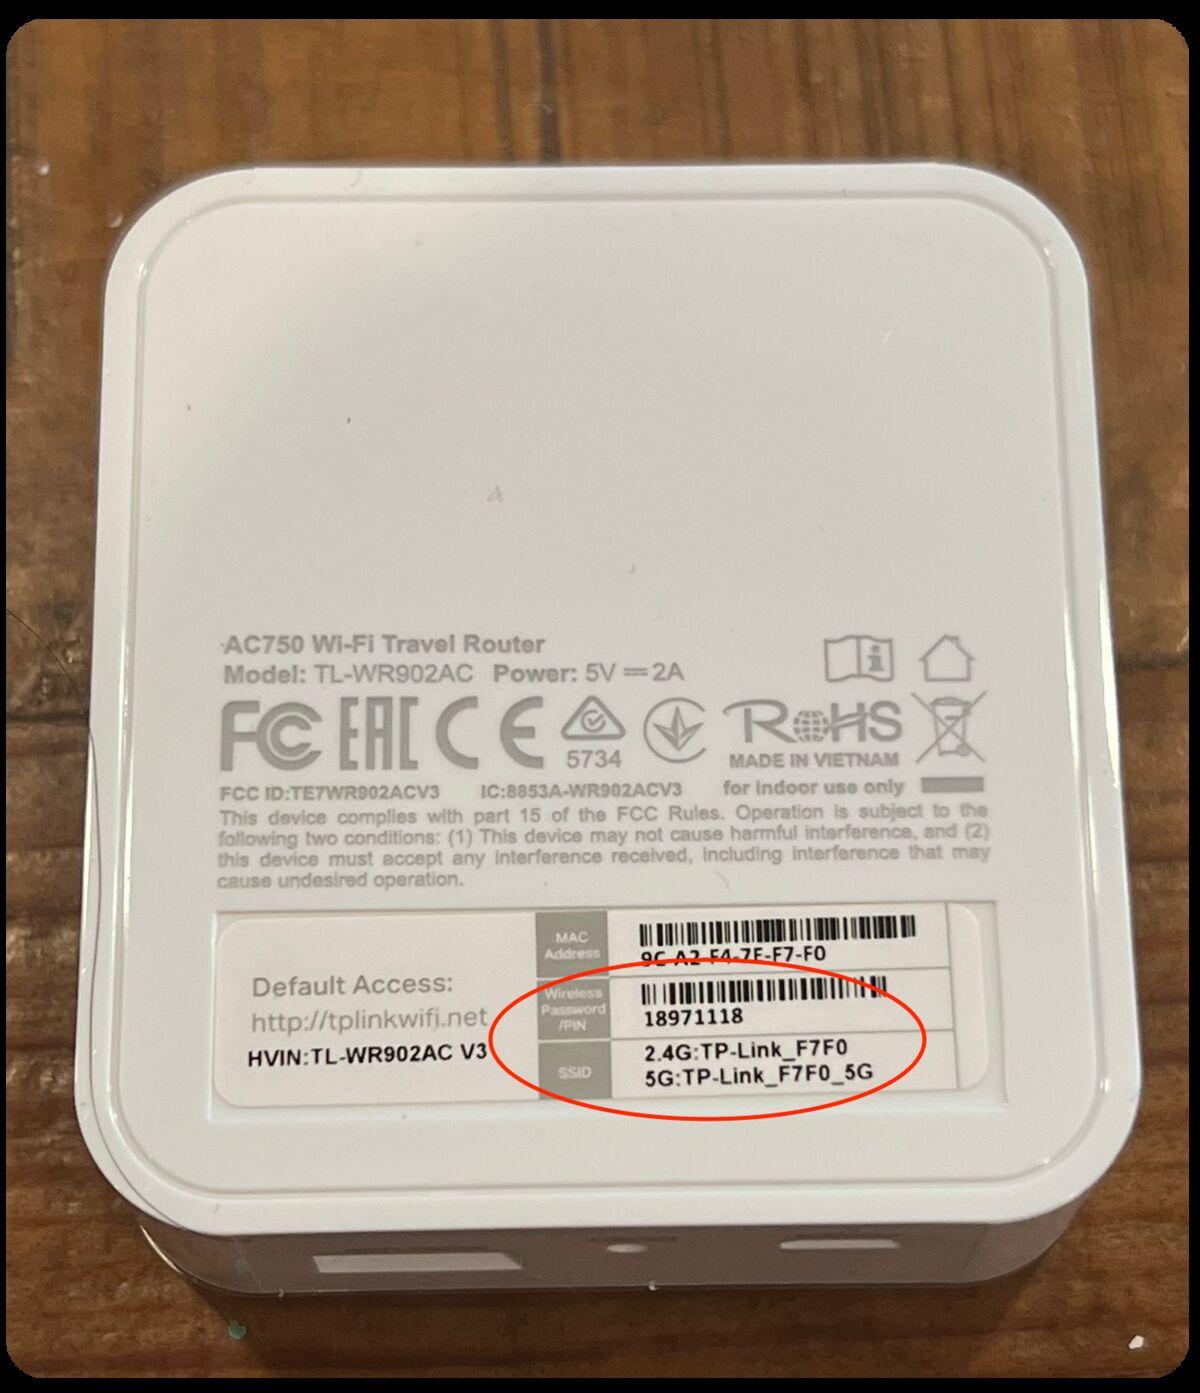
Write down the router's WiFi credentials
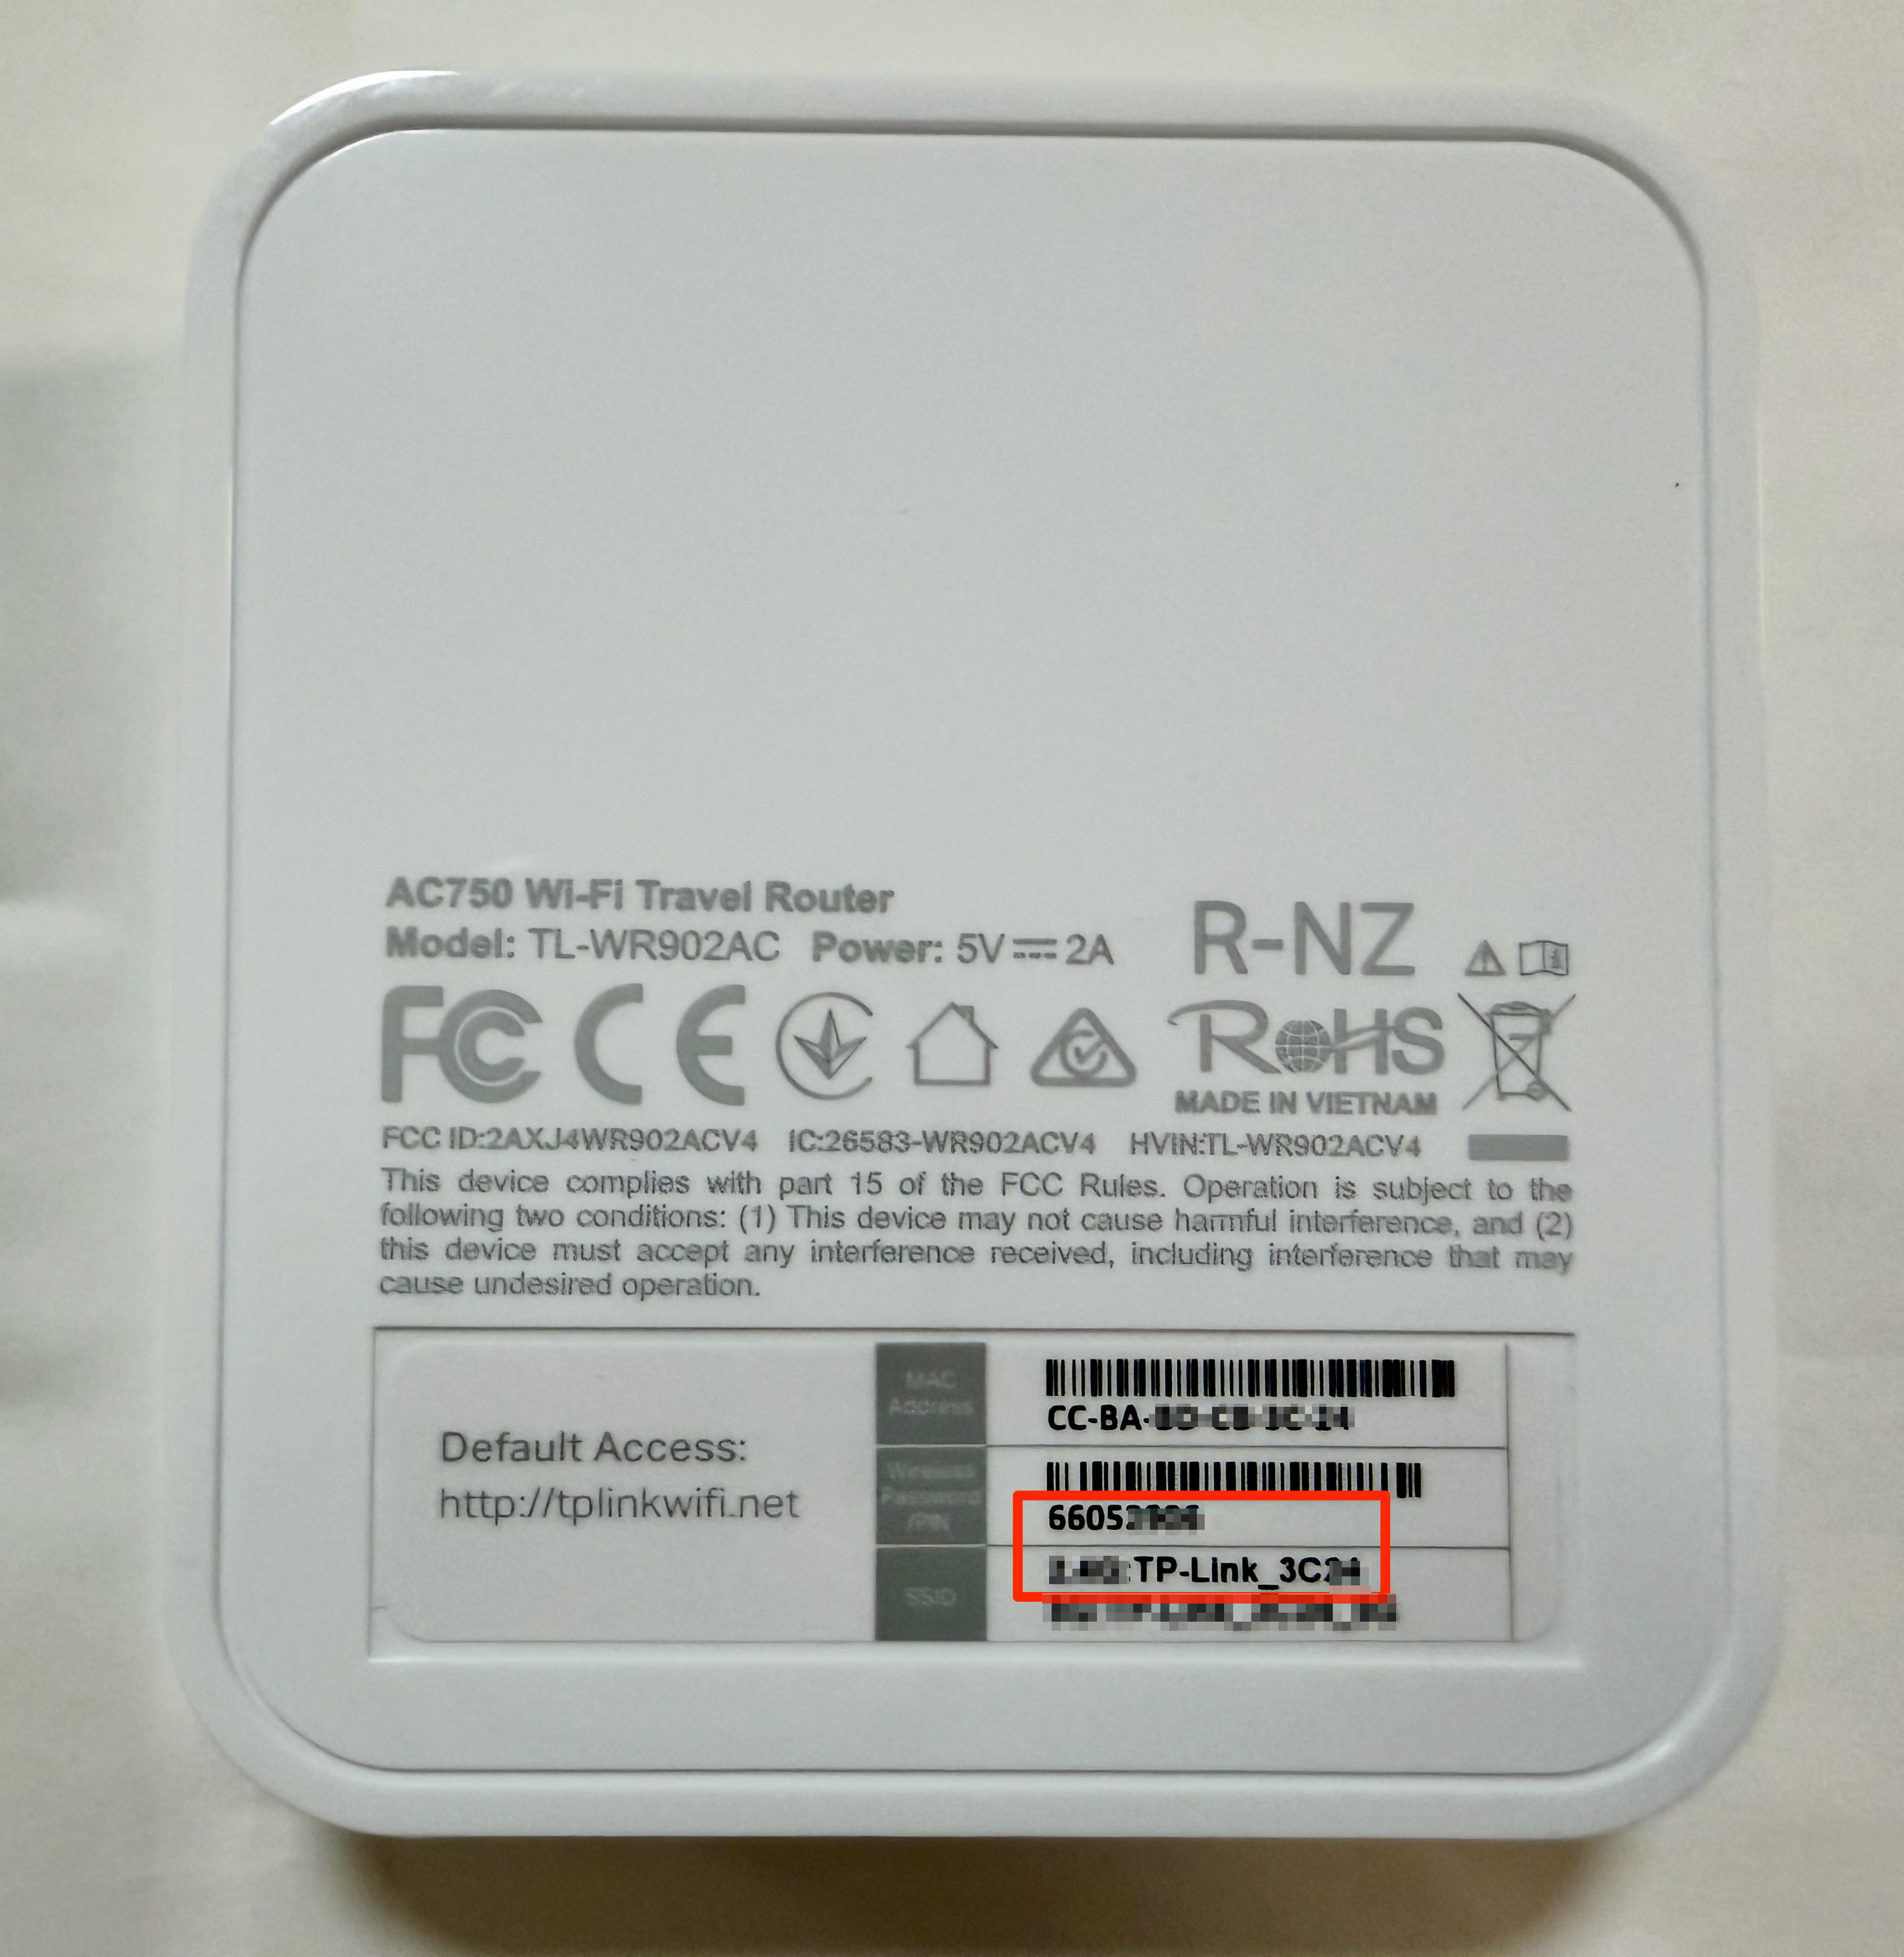
On the back of the mini router, you'll see the default SSID (network name) and password at the bottom of the label. Write both down — you'll need them for step 5.
Router 3 · Mode switch
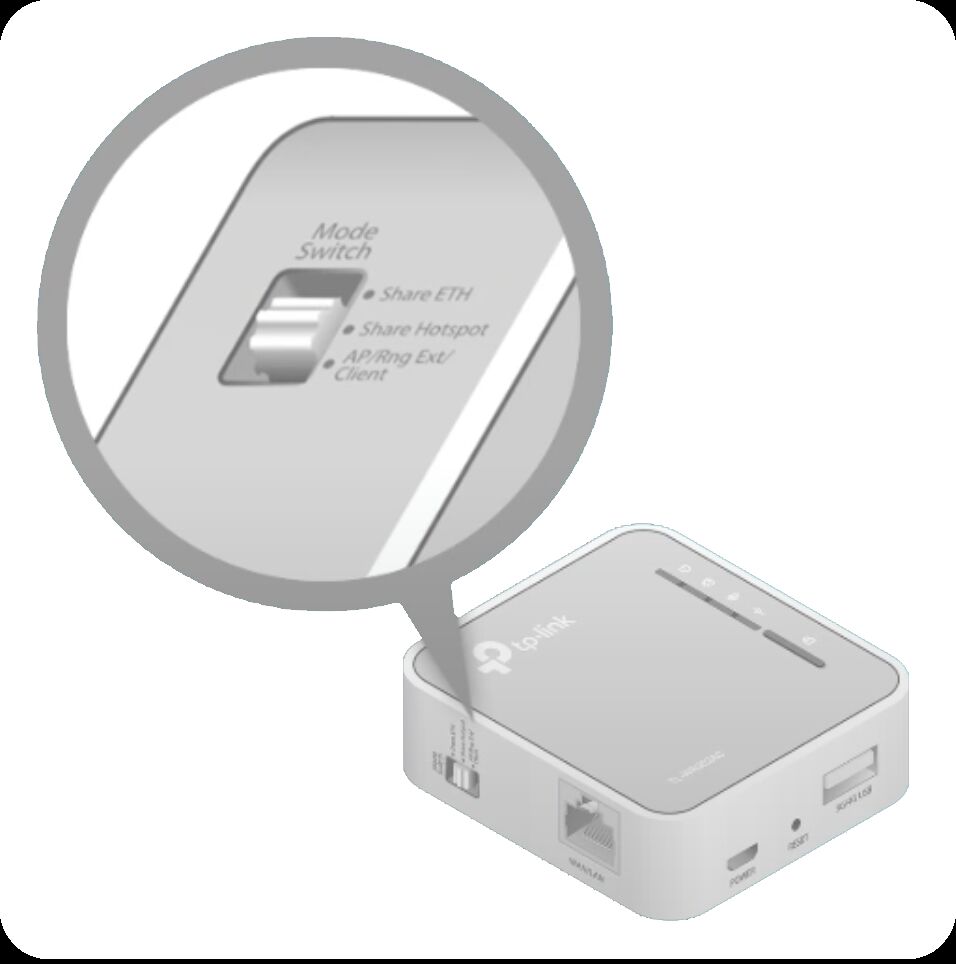
Move the side switch to "Share Hotspot"
On the side of the mini router there's a small Mode Switch with three positions. Slide it to the middle position labeled Share Hotspot.
Router 4 · Connect to printer
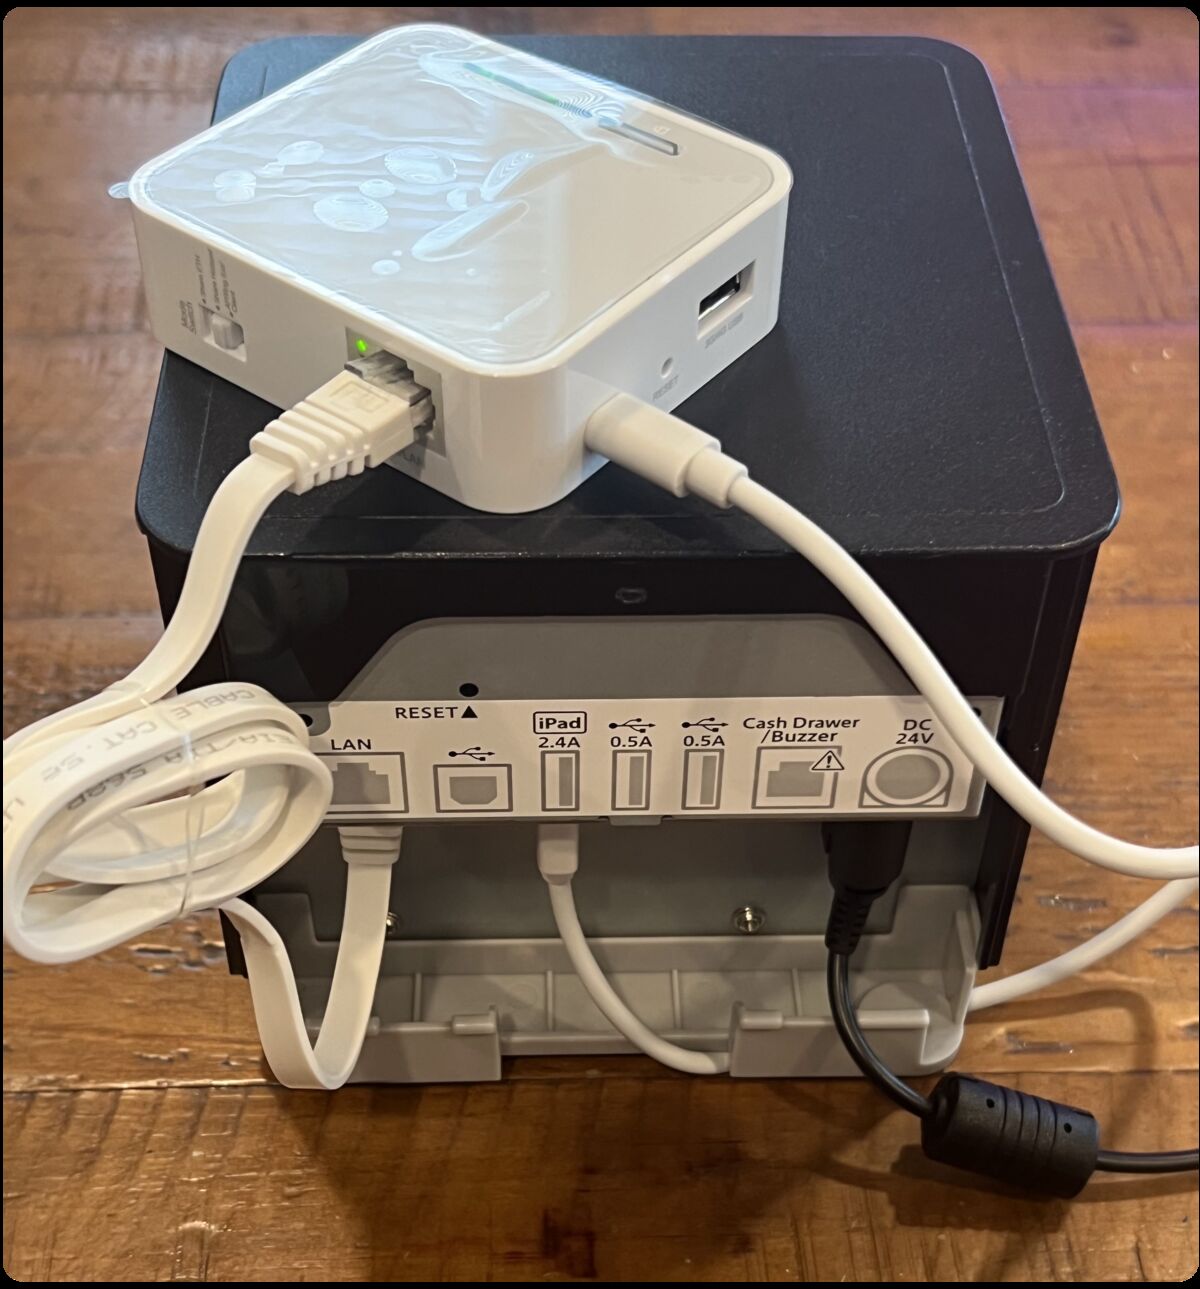
Connect the mini router to the printer
Two cables connect the router to the printer:
- Ethernet cable: LAN port on the router → LAN port on the printer.
- Micro USB cable: Power port on the router → USB port on the printer labeled iPad 2.4A.
Router 5 · Connect to the mini router
Connect your computer to the mini router
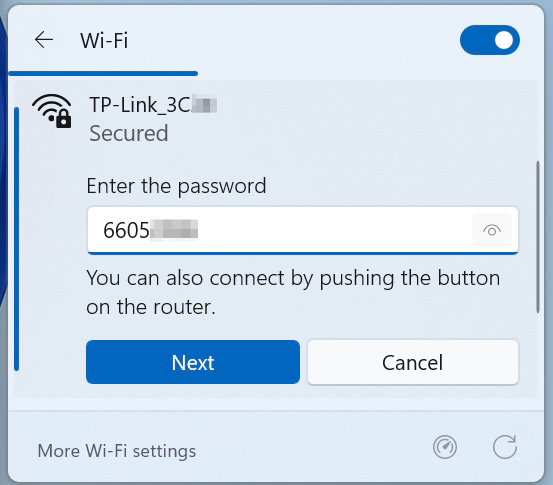
On a computer or device connected to your store's main internet, open your network settings and locate the TP-Link SSID listed on the back of the router. Select the network and connect using the password provided.
Router 6 · Open the setup page
Navigate to tplinkwifi.net
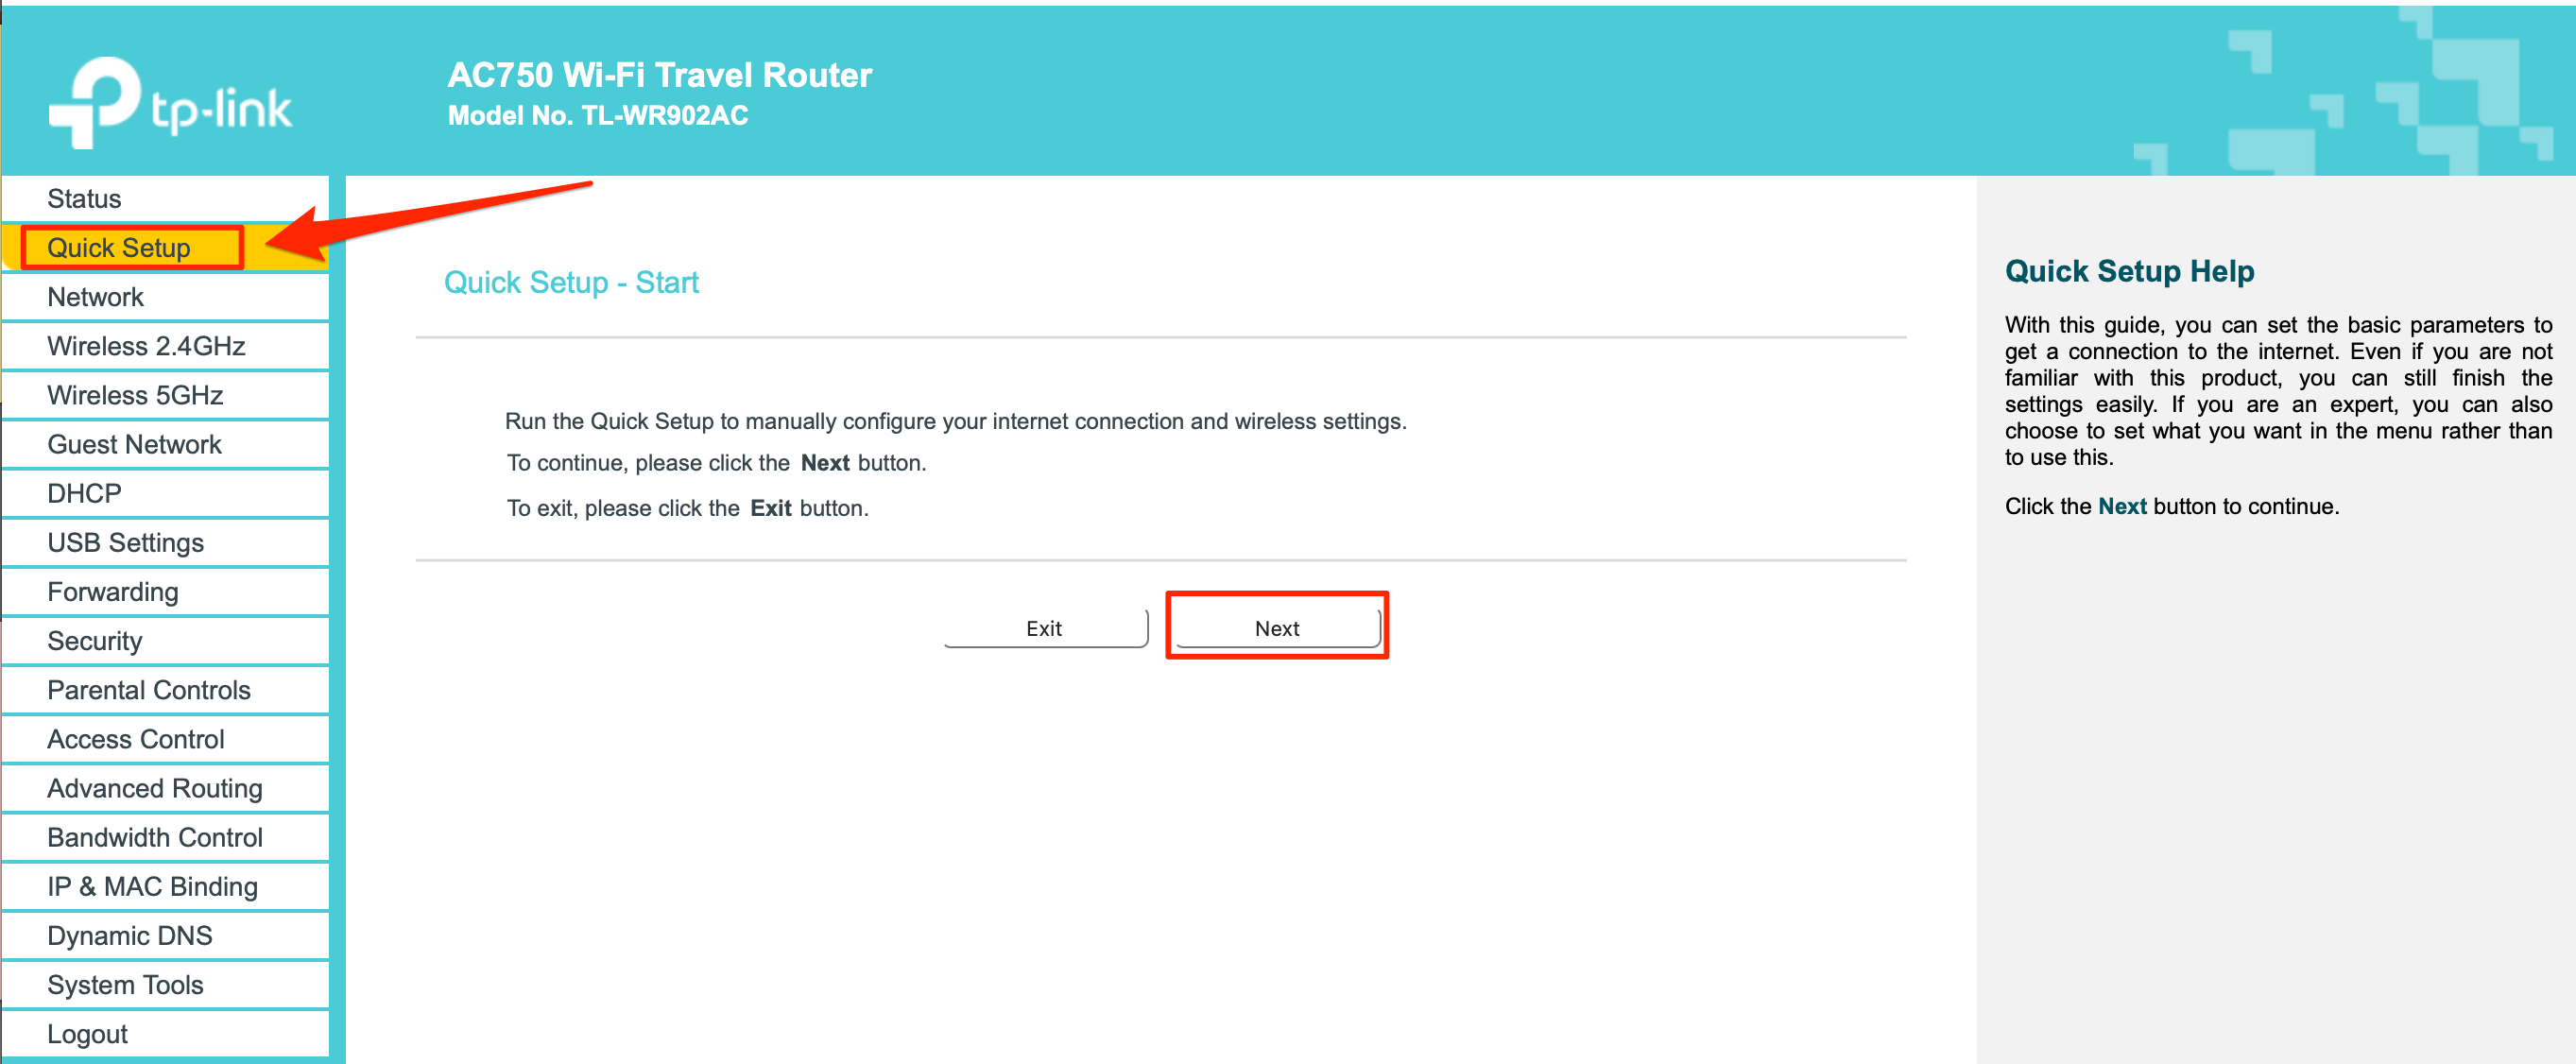
Once your computer is connected to the mini router's internet, open a browser and navigate to tplinkwifi.net. You'll be prompted to create an account — use something your store will remember. Once logged in, click Quick Setup in the left-side column and click Next.
Router 7 · Choose the connection type
Connect the router to your store WiFi
Select Dynamic IP for the WAN connection type, then click Next. Allow the page to load and locate your store's internet name. Click Connect, enter the password, and click Finish. Review the page, and you'll be prompted to select Finish once more.
Router 8 · Switch back
Switch your device back to the main internet
Once this is complete, you can move your device back to your main internet host. The printer's Network LED should turn solid green once the router connects.
Step 7 · Open the paper compartment
Open the front cover
Pull the release lever on the top-left of the front of the printer to swing the cover open.
Step 8 · Set the paper roll
Place the receipt paper roll inside
Make sure the roll is tightly wound and not loose. Drop it in following the direction shown on the inside of the front tray — the paper should feed off the top of the roll, not the bottom.
Step 9 · Close the cover
Pull the paper out and close the cover
Hold the end of the paper so it sticks straight up out of the printer, then press the front cover firmly closed. The printer will automatically cut the paper once. When it's seated correctly the Power LED turns solid blue.
Fix · Re-seat the paper roll
Re-seat the receipt paper roll
A flashing or red Power LED usually means the receipt paper roll isn't placed correctly. Take the roll out, retighten it so it's tightly wound, and place it back in following the direction shown on the inside of the front tray — the paper should feed off the top of the roll, not the bottom. Then close the cover firmly.
The Power LED should turn solid blue once the paper is properly seated.
Next step
The paper roll fix didn't work
If the Power LED is still flashing or red after re-seating the paper, there may be a deeper hardware issue. Run through the printer troubleshooter to diagnose further.
All set
Your printer should be back online
Now that the mini router is connected to your new WiFi, confirm everything's working:
- The printer's Power LED is solid blue and the mini router's Network LED is solid green.
- Send a test print from business.iheartjane.com › Settings › Hardware, or print a previous order.
Still not printing? Open the printer troubleshooter.
All set
Time to activate your printer
Don't have access to the Hardware section? Send us the details below and our team can enable the printer for you.
Your printer is connected. Now enable it and send a test print from the Hardware page in the Business Dashboard.
-
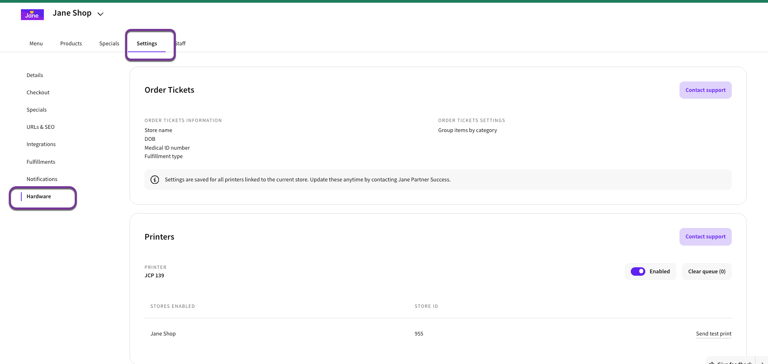
Select your store at business.iheartjane.com, then go to Settings › Hardware.
-
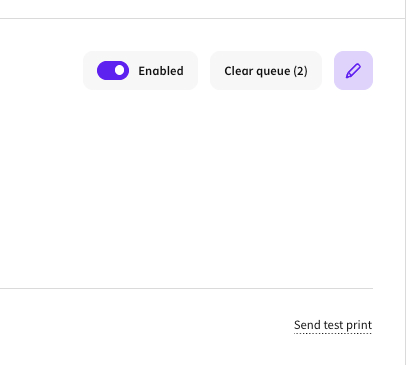
In the Printers section, use the toggle to enable your printer for the store.
-
Select Send test print to confirm everything is set up correctly. A test ticket should print within a few seconds.
For more on managing settings, enabling printers, and clearing the queue, see Business Dashboard Settings. Ran into trouble during setup? Open the printer troubleshooter.