Troubleshoot · Mini router WiFi
Reconnect the mini router to WiFi
If the mini router's Share Hotspot LED is blinking or off, it has lost its connection to your store WiFi. Run through these steps to reconnect it. If the store WiFi changed, you'll use the new network name and password.
Router 3 · Mode switch
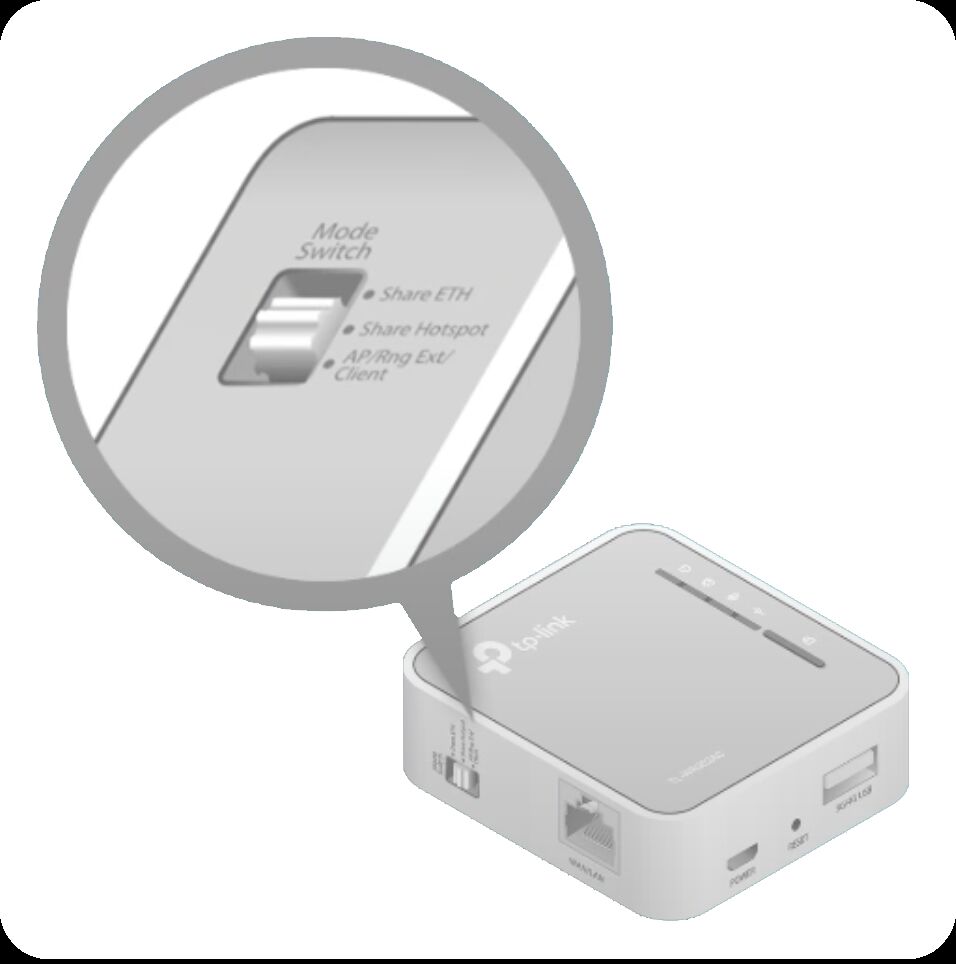
Move the side switch to "Share Hotspot"
On the side of the mini router there's a small Mode Switch with three positions. Slide it to the middle position labeled Share Hotspot.
Router 4 · Connect to printer
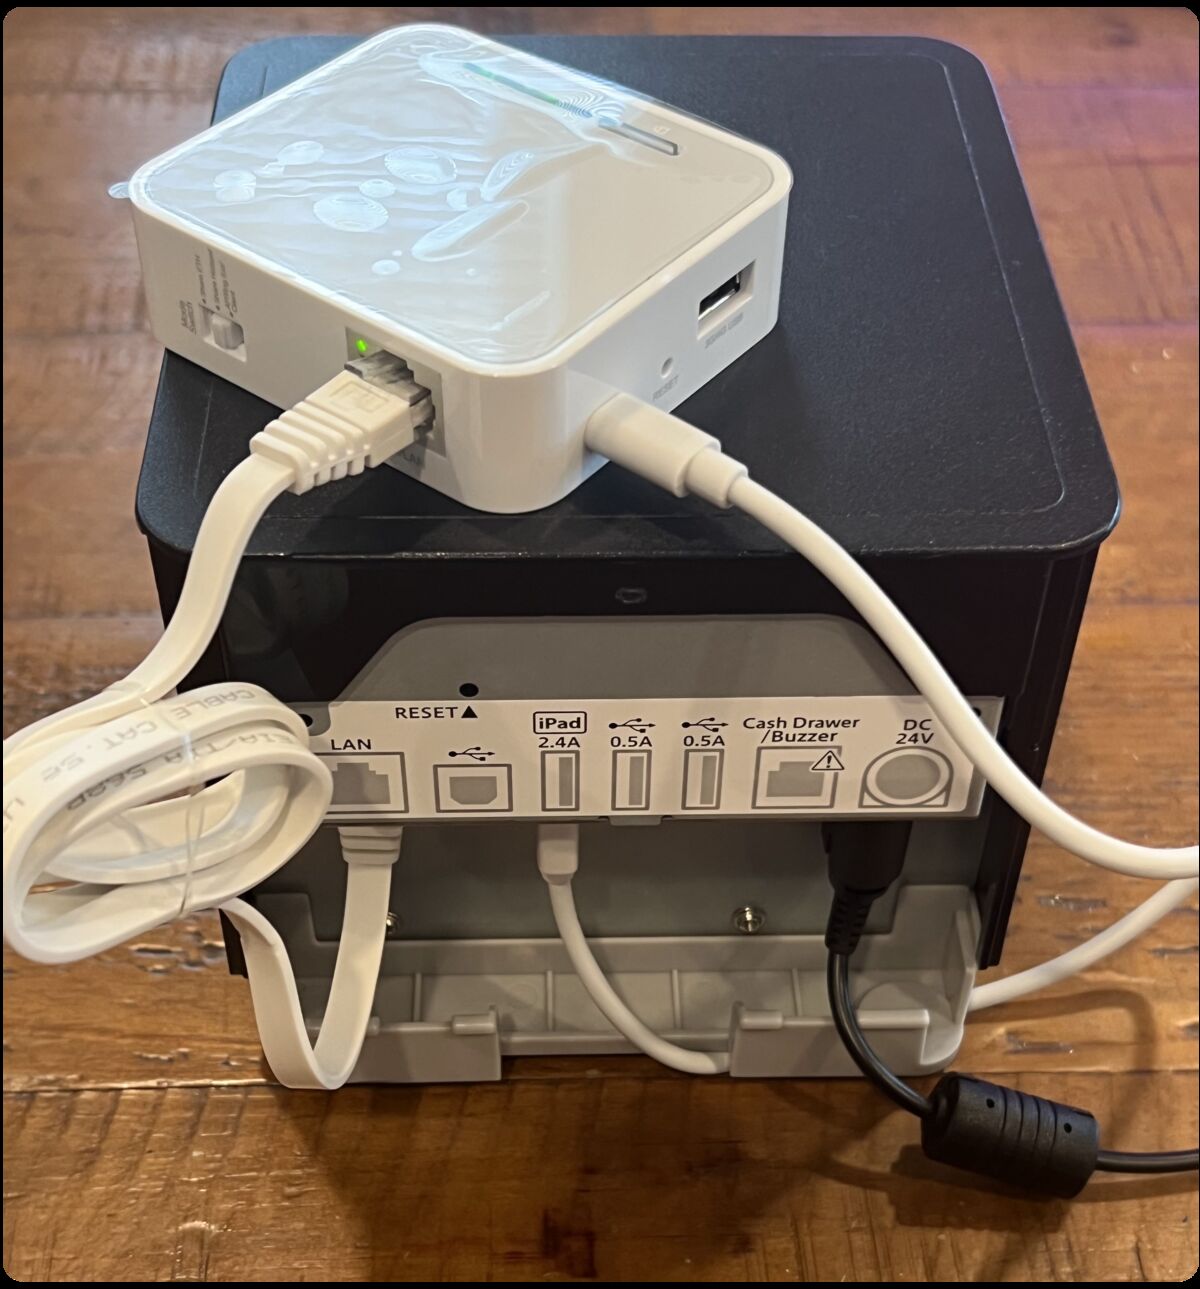
Connect the mini router to the printer
Two cables connect the router to the printer:
- Ethernet cable: LAN port on the router → LAN port on the printer.
- Micro USB cable: Power port on the router → USB port on the printer labeled iPad 2.4A.
Router 5 · Connect to the mini router
Connect your computer to the mini router
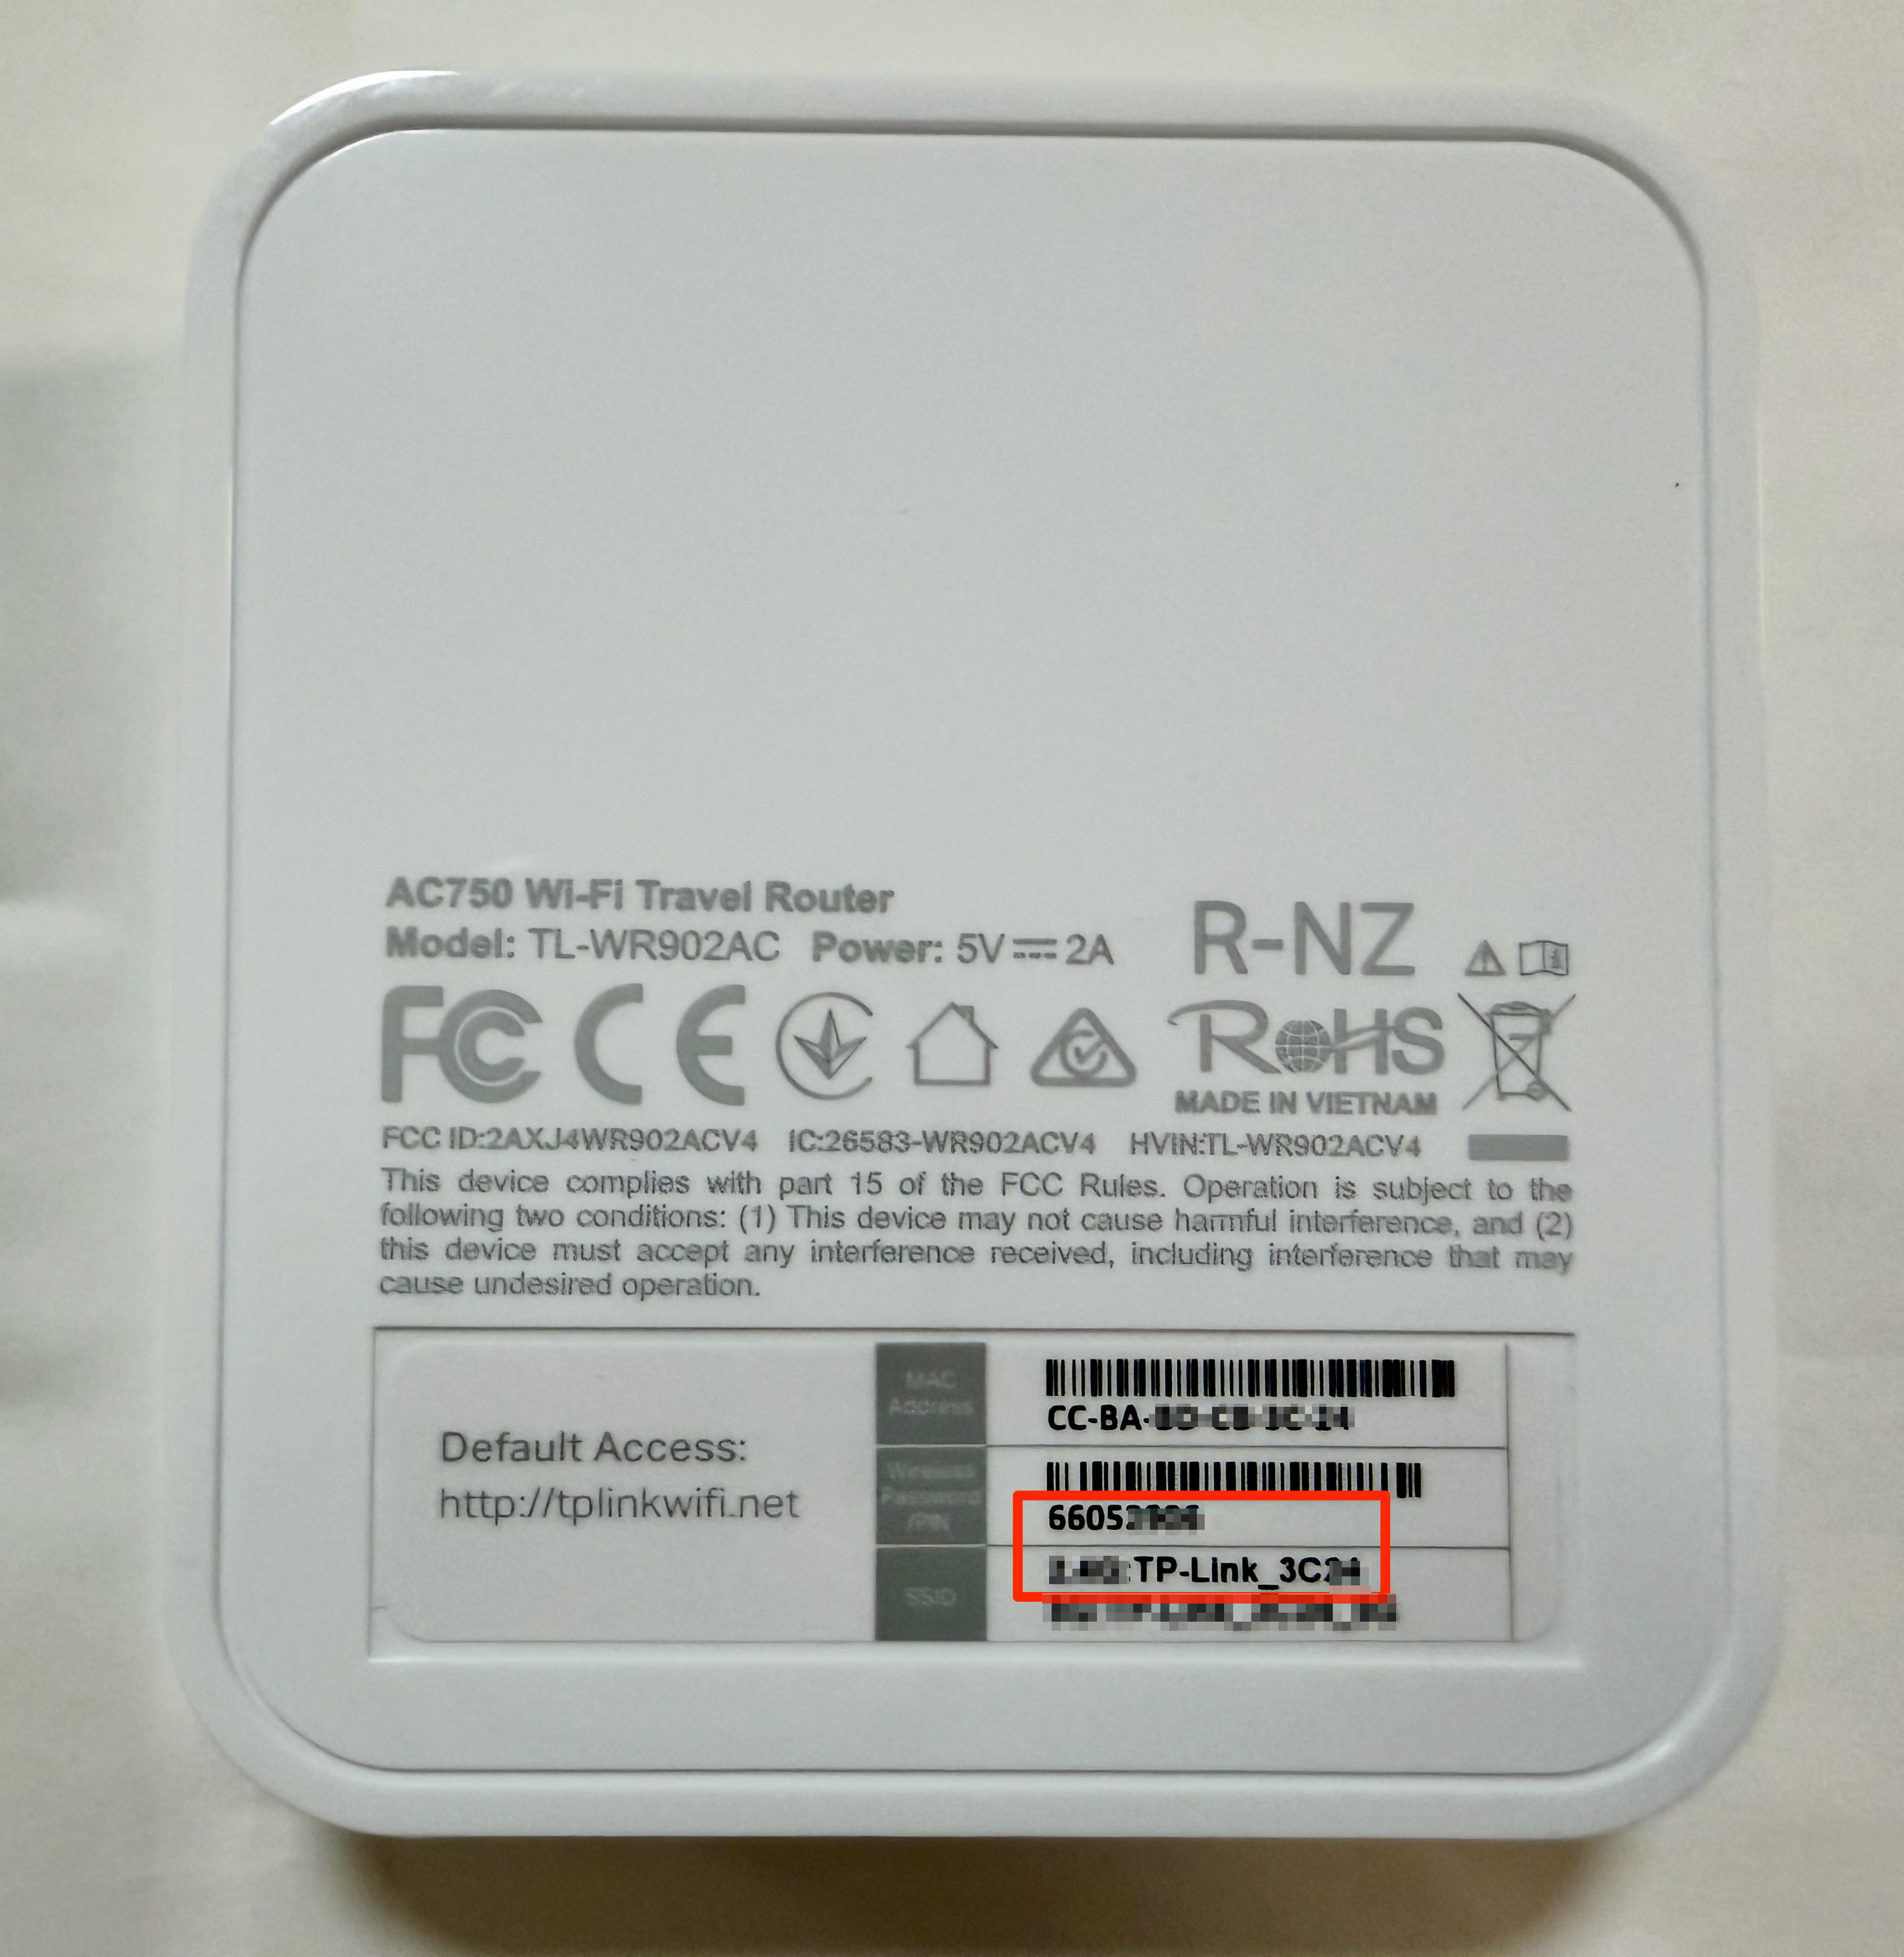
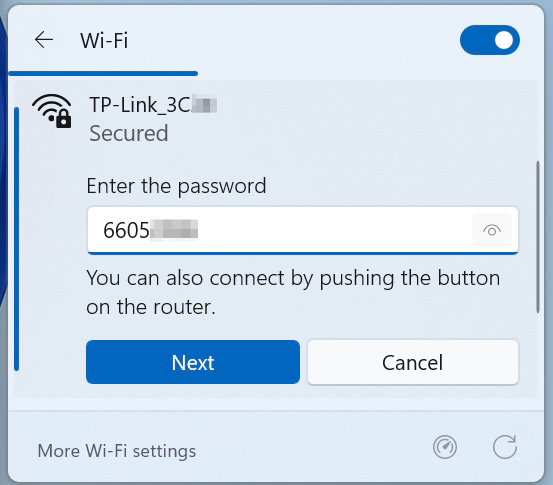
On a computer or device connected to your store's main internet, open your network settings and locate the TP-Link SSID listed on the back of the router. Select the network and connect using the password provided.
Router 6 · Open the setup page
Navigate to tplinkwifi.net
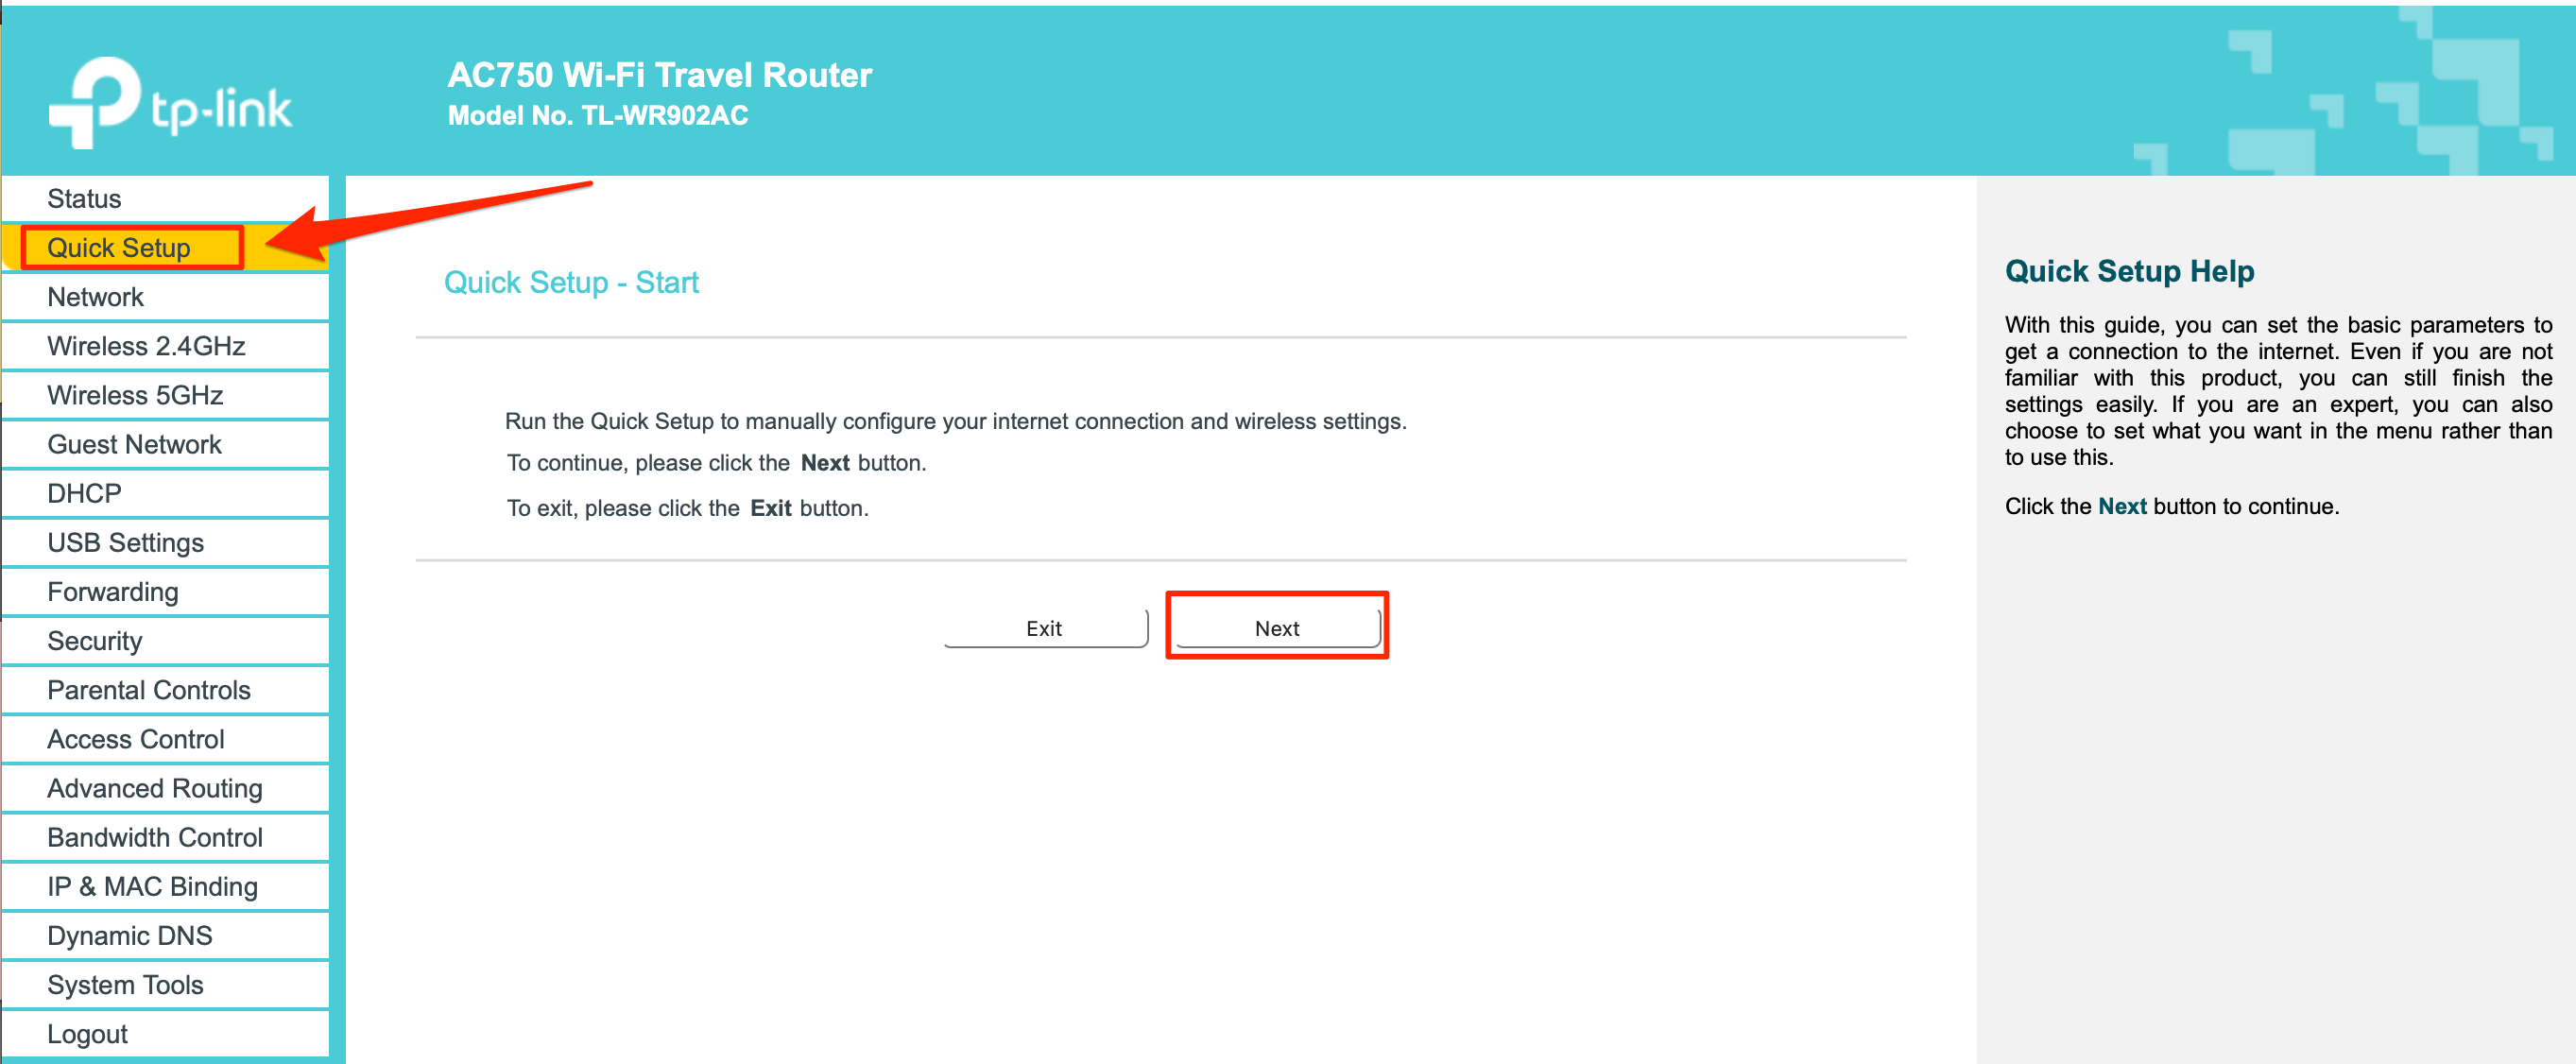
Once your computer is connected to the mini router's internet, open a browser and navigate to tplinkwifi.net. You'll be prompted to create an account — use something your store will remember. Once logged in, click Quick Setup in the left-side column and click Next.
Router 7 · Choose the connection type
Connect the router to your store WiFi
Select Dynamic IP for the WAN connection type, then click Next. Allow the page to load and locate your store's internet name. Click Connect, enter the password, and click Finish. Review the page, and you'll be prompted to select Finish once more.
Router 8 · Switch back
Switch your device back to the main internet
Once this is complete, you can move your device back to your main internet host. The printer's Network LED should turn solid green once the router connects.